Mastering Giraffe Art: Your Easy Guide On How To Draw A Giraffe Today
Have you ever looked at a giraffe and just felt a rush of wonder? These magnificent creatures, with their incredibly long necks and striking patterns, are, you know, quite a sight to behold. They are, as a matter of fact, the tallest land animals on our planet, with some males reaching up to a staggering 18 feet in height. Capturing their unique charm on paper can be, well, a delightful way to express your creative side. It's truly a rewarding experience, especially when you see your very own giraffe come to life from simple lines and shapes.
Maybe you're just starting out with drawing, or perhaps you're looking for a fun new animal to add to your sketchbook. Anyway, learning how to draw a giraffe can seem a little tricky at first, what with their distinctive features and all. But don't you worry, because this guide is here to make it super simple for you. We'll show you, in some respects, several ways to approach drawing these gentle giants, whether you're aiming for a playful cartoon look or something a bit more true to life.
So, get ready for some giraffe fun! This lesson is, you know, perfect if you're just starting out, or if you're a budding artist eager to expand your animal drawing skills. We'll walk through the easy steps and illustrations, helping you create an amazing giraffe drawing effortlessly. You'll soon be able to depict this fascinating creature as the main subject of your art, or perhaps even have it complement a jungle scene or a busy zoo picture. It's going to be, honestly, a great time.
Table of Contents
- Why Draw a Giraffe?
- Getting Started: Your Drawing Supplies
- The Basics: Starting with Shapes
- How to Draw a Cartoon Giraffe (Step-by-Step)
- How to Draw a Realistic Giraffe (Step-by-Step)
- Drawing a Giraffe: Tips for Kids and Beginners
- Frequently Asked Questions About Drawing Giraffes
- Bringing Your Giraffe to Life with Color
- Your Artistic Journey Continues
Why Draw a Giraffe?
Drawing animals can be, you know, a truly delightful way to express your creativity, and giraffes are particularly fascinating creatures to capture on paper. Their long necks and distinctive patterns present a fun challenge, and honestly, they just look so unique. There's something really appealing about their gentle nature and how they move, which makes them a popular subject for artists of all skill levels. Plus, when you learn how to draw a giraffe, you're building foundational skills that can help you with other animal drawings, too.
It's also, you know, a wonderful way to connect with nature and appreciate the natural world around us. Thinking about how these animals live, how they look, and what makes them special can really spark your imagination. And, in a way, it's pretty cool to be able to recreate such an iconic animal with your own hands. So, whether it's for a school project, a gift, or just for your own enjoyment, drawing a giraffe is a rewarding pursuit that brings a little bit of the wild into your art.
Getting Started: Your Drawing Supplies
Before you begin your artistic adventure, it's, you know, a good idea to gather a few basic supplies. You don't need anything fancy, just some simple tools to get you going. A pencil, perhaps a standard HB or a softer B pencil, is really all you need to start sketching. You'll also want an eraser, because, well, mistakes happen, and that's totally okay. A good quality eraser can help you clean up lines and make adjustments without leaving smudges. And, of course, you'll need some paper. Any kind of drawing paper or even just plain printer paper will do just fine for practicing.
- All I Want For Christmas Is Books
- 80s Family Photoshoot
- Invictus Gaming 2025
- Do Recalls Expire
- I Miss Being A Kid
If you're thinking about adding color later, you might also want to have some colored pencils, crayons, or markers ready. They can really bring your cute giraffe drawing to life once you've finished the outline. Sometimes, people like to use fine-tip pens for outlining their drawings after sketching, which can give them a crisp, clean look. But for now, just a pencil, an eraser, and paper are perfectly enough to begin your journey of learning how to draw a giraffe. It's about getting started, you know?
The Basics: Starting with Shapes
When you're learning how to draw a giraffe, it's, you know, really important to start with the basic shapes that make up the giraffe's body. This approach simplifies the process and helps you get the proportions right before adding all the finer details. Think of it like building a house; you start with the foundation and the main structure before putting in the windows and doors. This method is, honestly, perfect for kids and beginners, as it breaks down a seemingly complex drawing into manageable steps.
We'll use simple geometric forms, which are, as a matter of fact, the building blocks of almost any drawing. By explaining how to create these basic shapes, we can then gradually refine them into the recognizable form of a giraffe. It’s a very common technique used by artists, and it makes the whole process much less daunting. So, let's look at what those initial shapes are and how they fit together to form our tall friend.
Body and Neck Foundations
To begin, you'll want to sketch out an oval shape for the giraffe's body. This oval doesn't need to be perfect; it's just a guide, really. Make it, you know, a decent size, as this will be the largest part of your giraffe. Then, for the giraffe's famously long neck, you can draw a long rectangle or, perhaps, two slightly curved lines running upwards from the oval. This rectangle should be, like, quite tall, reflecting the giraffe's incredible height. It's important to remember that giraffes are, you know, the tallest land animals, so their necks are a defining feature.
You can think of the neck as being almost as long as the body itself, or even longer, depending on the perspective you're going for. This initial structure gives your giraffe a solid base. We're just, you know, laying down the framework here. These basic shapes, the oval for the body and the long rectangle for the neck, are the very first steps in creating your giraffe drawing. They help you establish the overall size and posture of your animal before you add any more specific details. It's, honestly, a simple yet very effective way to start.
Head and Legs
Once you have the body and neck in place, it's time to add the head and legs. For the head, you can draw a smaller oval or a sort of rounded rectangle at the top of the neck. This shape will eventually become the giraffe's distinctive head, complete with its ossicones (those horn-like structures). Don't make it too big, you know, just something proportionate to the neck you've drawn. It's a fairly small part compared to the rest of the body, but it's very important for giving your giraffe character.
Next, for the legs, draw four long, thin rectangles extending downwards from the body oval. Giraffe legs are, you know, quite slender and very long, so make sure your rectangles reflect that. They should be, like, roughly the same length as the neck, if not a bit longer. You can, perhaps, add small ovals at the bottom of each leg to represent the hooves. These initial shapes are just, you know, placeholders. You'll refine them later, but for now, they give you the overall stance and structure of your giraffe. This is, you know, how we build the whole creature from basic forms.
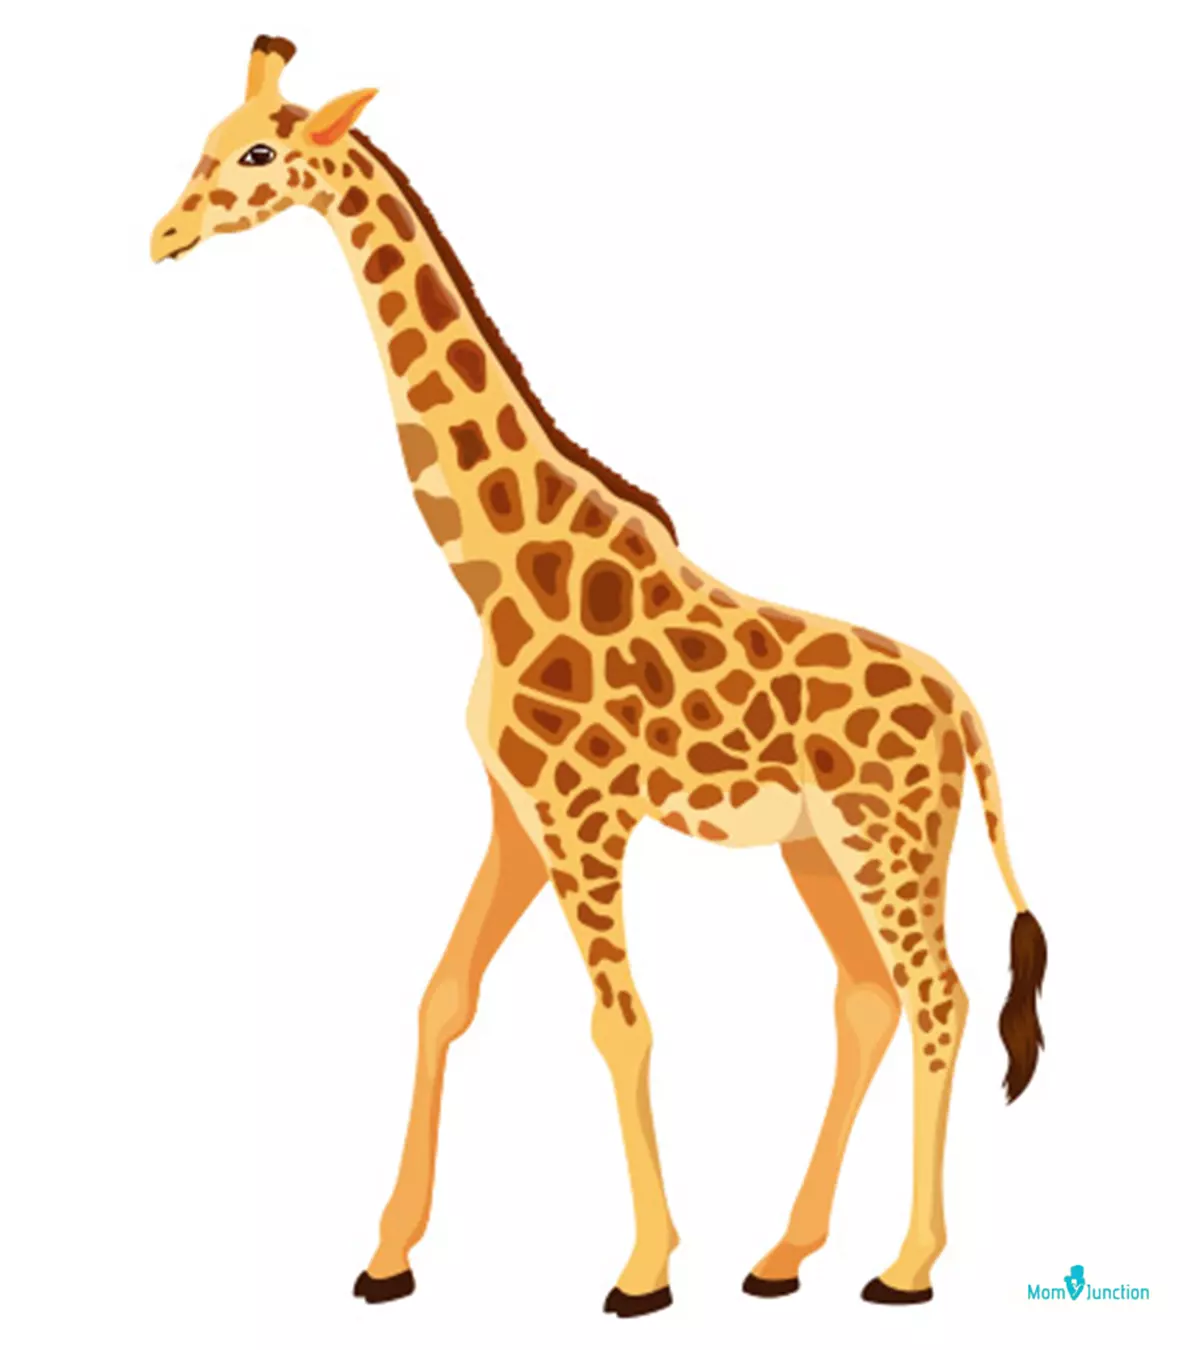
How to Draw a Cartoon Giraffe (Step-by-Step)
Drawing a cartoon giraffe is, you know, a fantastic way to capture the animal's essence with a fun, simplified style. The cartoon giraffe you can draw with this tutorial often looks like a baby giraffe, which is, honestly, super cute. This approach is perfect if you like cartoons, and it's a great way to depict the giraffe as a main subject or even as a playful addition to a jungle or zoo scene. We'll go through the steps in a simple, step-by-step manner, starting from those basic shapes we just talked about.
It's all about exaggeration and personality when it comes to cartoons, you know? You can make the eyes bigger, the neck a little squigglier, or the spots more whimsical. This method is, honestly, very forgiving, so don't be afraid to experiment a little. By learning how to draw a cartoon giraffe, you'll be able to create charming and expressive characters that are, you know, uniquely yours. So, let's get into the details of bringing your cartoon giraffe to life.
Cartoon Body Outline
Start with that oval shape for the body, just like we discussed. For a cartoon, you can make this oval a bit more rounded or even slightly pear-shaped, depending on the look you're going for. Then, for the neck, instead of a strict rectangle, draw two curved lines that gently widen as they go up from the body. This gives the neck a softer, more playful feel, which is, you know, typical for cartoons. The neck should still be long, but perhaps not as rigidly straight as a realistic one.
For the head, a simple, rounded shape at the top of the neck works well. You can make it a little larger than you would for a realistic giraffe, giving it a more expressive face. Then, add two short, slightly curved lines for the legs, ending in simple, rounded feet. Remember, for a cartoon, proportions can be, you know, a bit exaggerated for cuteness. So, if you want a really baby-like giraffe, you might make the head a little bigger in relation to the body. This initial outline is the foundation for your charming cartoon friend.
Adding Cartoon Features
Now that you have the basic outline, it's time to add the features that make your giraffe truly cartoony. For the eyes, draw two large circles, and then add smaller circles inside for the pupils. You can even add a tiny white circle within the pupil to give it a sparkle, which, you know, makes it look very lively. For the nose, two small ovals or dots work perfectly on the snout. A simple curved line can represent a friendly smile.
Don't forget the ossicones! For a cartoon, these can be simple, rounded bumps on top of the head, perhaps with a small dot at the tip. And for the ears, draw two leaf-like shapes on either side of the head. You can make them a bit floppy or perky, depending on the personality you want your giraffe to have. Remember, it's about making it cute and expressive. These features are, you know, what really bring out the cartoonish charm of your drawing. It's, honestly, a lot of fun to give them character.
Spots and Details for Your Cartoon
The spots are, you know, a defining feature of any giraffe, cartoon or realistic. For your cartoon giraffe, you can draw irregular, blob-like shapes all over its body and neck. They don't have to be perfectly uniform; in fact, varying their sizes and shapes adds to the cartoon appeal. You can make some bigger, some smaller, some more rounded, and others a bit more angular. This variety gives your drawing a lot of visual interest.
You might also want to add a small tuft of hair at the end of the tail, perhaps just a few squiggly lines. And if your cartoon giraffe is a baby, you could make the spots a little lighter or more scattered. These final details are what really finish off your drawing and make it look complete. So, you know, take your time with the spots, as they are a very recognizable part of the giraffe's appearance. It's, honestly, the best part, adding all the personality.
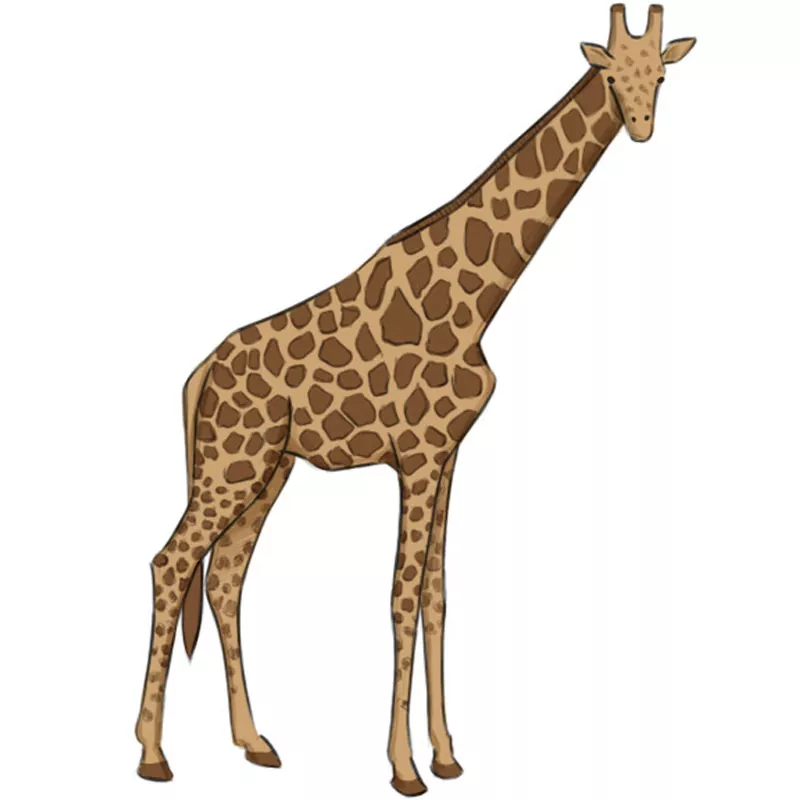
How to Draw a Realistic Giraffe (Step-by-Step)
While the web is, you know, sometimes dominated by cartoons and drawing tutorials by people who really can't draw very well, I'm going to show you how to draw a realistic giraffe. This approach focuses on accurate proportions and detailed features to create a drawing that truly resembles these magnificent animals. It can be, you know, a bit more challenging than a cartoon, but the reward of seeing a lifelike giraffe emerge from your pencil strokes is, honestly, quite immense. We'll follow the simple steps and illustrations to create your own realistic giraffe drawings.
For this, you'll pay closer attention to the subtle curves and angles of the giraffe's body. We'll use those initial basic shapes as a guide, but then we'll refine them much more precisely. This method is, you know, great for those who want to push their drawing skills a little further and capture the true elegance of a giraffe. So, let's get ready to build a realistic portrayal, step by step, making sure every line counts.
Building the Realistic Form
Start with that large oval for the body, making sure it's elongated and somewhat horizontal, as a giraffe's body is quite streamlined. For the neck, draw two long, slightly curved lines that extend upwards from the body, gradually widening towards the base and narrowing slightly towards the head. The neck should be, you know, very long and powerful, reflecting the giraffe's actual anatomy. It's important to get this length right, as it's a key characteristic.
For the head, a more angular, almost wedge-like shape at the top of the neck works well for realism. It's not a simple oval anymore; think of it as a combination of straight lines and gentle curves. Then, for the legs, draw four very long, straight lines extending downwards from the body. These should be, you know, quite slender. Add small, blocky shapes at the bottom for the hooves. These initial lines are your construction lines, and you'll refine them as you go. You can, perhaps, follow along with a video tutorial if you find it helpful, pausing after each step to draw at your own pace.
Refining the Realistic Shape
Now, it's time to refine those initial shapes into a more natural, realistic form. Go over your initial lines, smoothing out the curves and adding subtle bulges for muscle definition, especially around the shoulders and hindquarters. The neck, you know, should have a gentle S-curve, not just a straight line. Pay attention to how the neck connects to the body, making that transition look seamless and strong. You can, for instance, look at pictures of real giraffes to get a better idea of their form.
For the legs, refine them to show the joints, like the knees and ankles. They aren't just straight sticks; they have distinct bends. The hooves should be, you know, cloven, meaning they are split in two. For the head, start to shape the muzzle, the eyes, and the ears more precisely. The eyes should be placed on the sides of the head, giving the giraffe a wide field of vision. The ossicones should look like bone-covered cartilage, perhaps a bit bumpy. This stage is all about, you know, giving your giraffe a lifelike appearance.
Adding Realistic Patterns and Texture
The giraffe's distinctive patterns are, you know, what truly makes it recognizable. For a realistic giraffe, these aren't just random blobs; they are irregular patches, often somewhat polygonal, with lighter lines separating them. Start by lightly sketching these patch outlines all over the body and neck. They tend to be larger on the body and smaller, more elongated on the legs and face. It's, honestly, a bit like putting together a puzzle.
Once you have the outlines of the patches, you can start to add shading or texture within them to give them depth. Giraffe coats aren't perfectly smooth; they have a slight texture. You can use very light, short strokes to suggest this. For the mane, draw a short, stiff ridge of hair running down the back of the neck. And for the tail, a long, slender line ending in a tuft of dark hair. These details are, you know, what truly brings out the realism in your giraffe drawing. You might even want to look up some information about giraffe conservation to inspire your detailed work.
Drawing a Giraffe: Tips for Kids and Beginners
Learning how to draw a giraffe can be, you know, both challenging and rewarding, especially when you're just starting out. But don't let that discourage you! This guide is, honestly, perfect for kids and beginners, offering simple steps and illustrations that make the process easy and fun. The key is to keep it simple, be patient with yourself, and enjoy the process. Drawing is, after all, a creative outlet, and it should be a joyful experience, not a stressful one. So, you know, let's look at some tips to make your drawing journey even smoother.
It's all about building confidence, you know? Every line you draw, every shape you create, is a step forward. You don't have to be perfect from the very first try. The goal is to learn and to have a good time doing it. So, whether you're drawing a cartoon giraffe that looks like a baby or trying your hand at a more realistic one, these tips will help you along the way. It's, honestly, about making art accessible and enjoyable for everyone, no matter their skill level.
Keeping It Simple
For kids and beginners, the best approach is, you know, to keep things as simple as possible. Don't try to add too many details right away. Focus on those basic shapes first: the oval for the body, the long rectangle for the neck, and then the simpler shapes for the head and legs. Once you have these foundational shapes down, you can gradually add more details. It's like building with blocks; you start with the big ones.
Also, don't press too hard with your pencil at first. Use light, sketchy lines that you can easily erase if you need to make changes. This allows you to experiment and adjust your drawing without leaving deep marks on the paper. Remember, the goal is to create an amazing giraffe drawing effortlessly, and that often means taking it one simple step at a time. You'll find that, you know, this method really helps to build your confidence as you go.
Using Video Tutorials
Video tutorials can be, you know, incredibly helpful, especially for visual learners. There are many great ones available that show you how to draw a giraffe in 5 easy steps for kids, or even more detailed ones for realistic drawing. The beauty of a video tutorial is that you can watch the artist draw each line in real-time. This can be, you know, very reassuring, as you see exactly how the shapes are formed.
When you're watching a video, make sure to pause the video after each step to draw at your own pace. Don't feel rushed to keep up with the video. Take your time, draw the lines, and then hit play again when you're ready for the next part. This way, you can truly absorb each instruction and make sure your drawing is coming along just right. It's, honestly, like having a personal art teacher right there with you.
Making It Fun
The most important thing, especially for kids, is to make the drawing process fun! Put on some music, draw with a friend or family member, or even tell a story about the giraffe you're drawing. If you're drawing a cartoon giraffe, you can give it a funny expression or put it in a silly pose. The more enjoyable the experience, the more likely you are to keep practicing and improving.
Don't be afraid to experiment with colors once your drawing is complete. You can use traditional giraffe colors, or you can get creative and give your giraffe a rainbow coat! There are no rules when it comes to having fun with art. So, you know, get ready for some giraffe fun, and let your imagination run wild. It's, honestly, all about expressing yourself and having a good time.
Frequently Asked Questions About Drawing Giraffes
People often have questions when they're learning a new drawing skill, and drawing giraffes is no different. Here are a few common questions that, you know, people often ask, along with some helpful answers to guide you.
Is it hard to draw a giraffe?
Learning how to draw a giraffe can seem a bit challenging at first, mostly because of their unique proportions, like that very long neck and those tall legs. However, it's, you know, not really hard if you break it down into simple steps. By starting with basic shapes, like ovals and rectangles, and then gradually adding details, anyone can create a great drawing. It's all about taking it one step at a time and, you know, being patient with yourself.
What shapes do you use to draw a giraffe?
To draw this giraffe step by step, you'll primarily use basic shapes to start. An oval is used for the main body, and a long rectangle or two parallel lines form the neck. Smaller ovals or rounded shapes
How to Draw a Giraffe - Easy Drawing Art
How To Draw Lotus: Easy Step-By-Step Guide

Giraffe standing isolated Royalty Free Vector Image
